How to Setup a Payment Method
Before the end of your free trial of Shaxpir Pro, or before upgrading to Shaxpir Pro from a Shaxpir Free account, you’ll need to setup a payment method… a credit card, a bank account, or some other source of funds.
To begin, click on the BILLING link in the left-hand navigation menu:
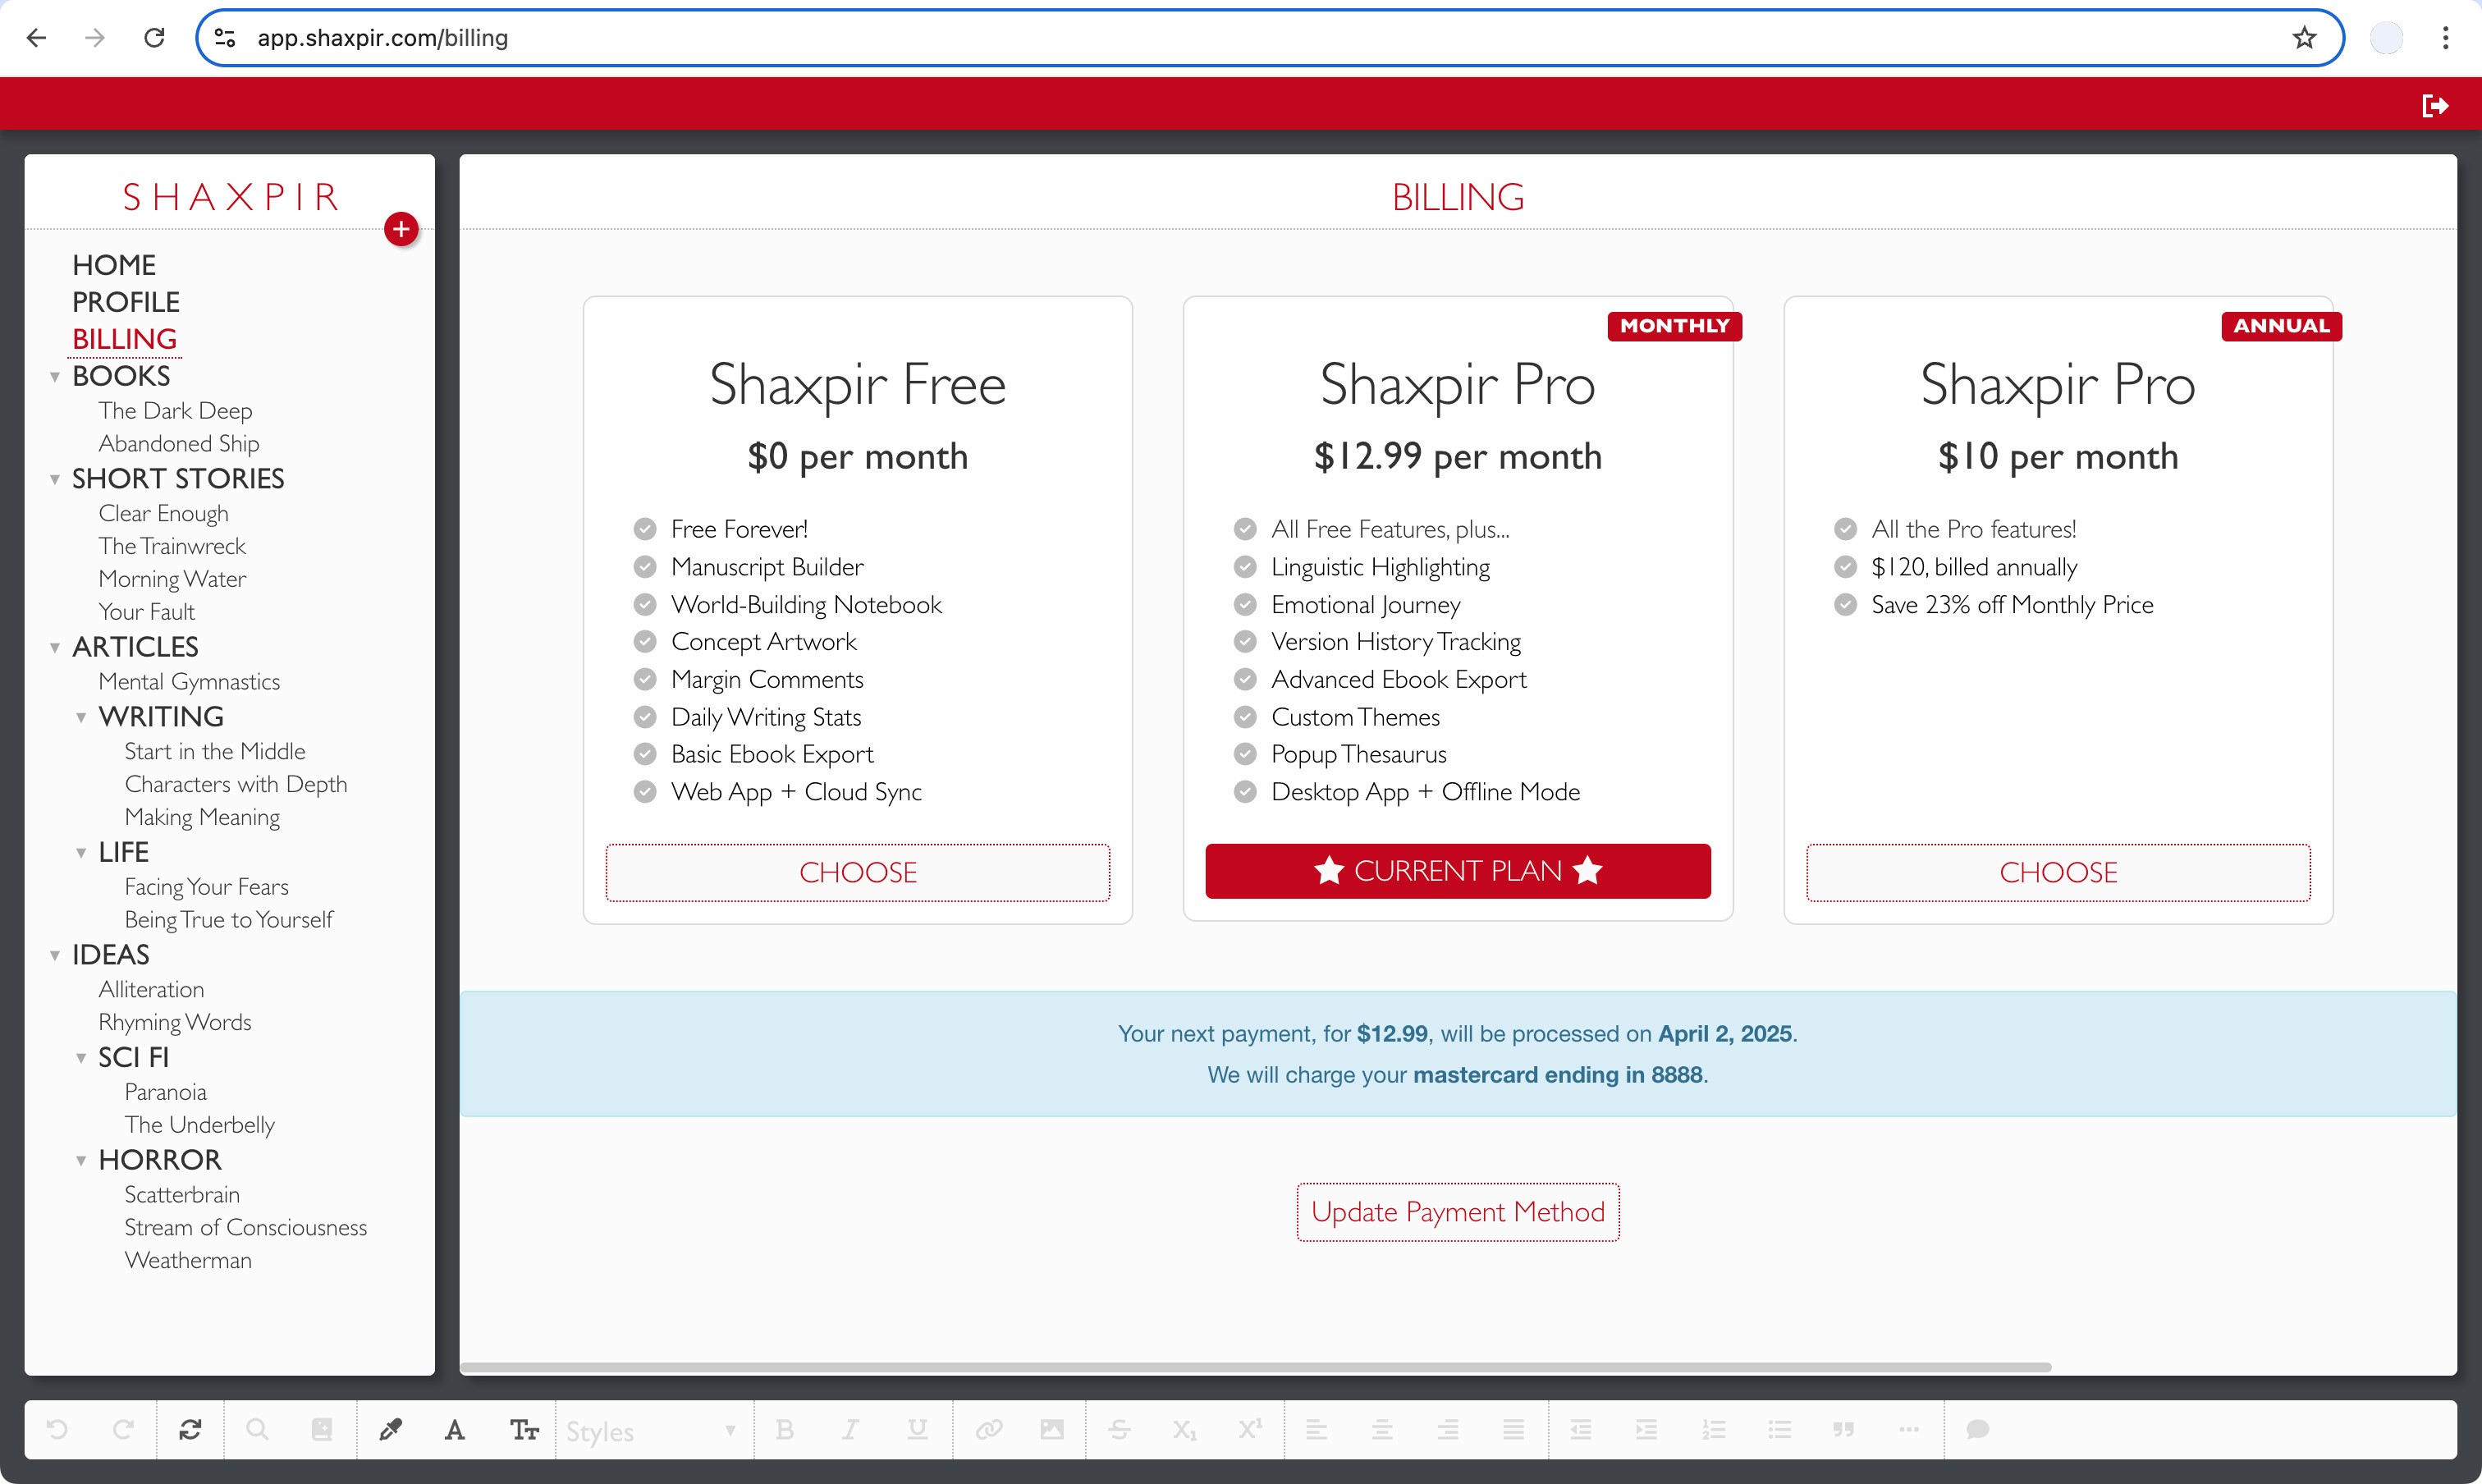
This will take you to the Billing Panel (which you can also find by navigating directly to https://app.shaxpir.com/billing).
At the bottom of the panel, beneath the pricing table, and in the center of the screen, you’ll find an Update Payment Method button.
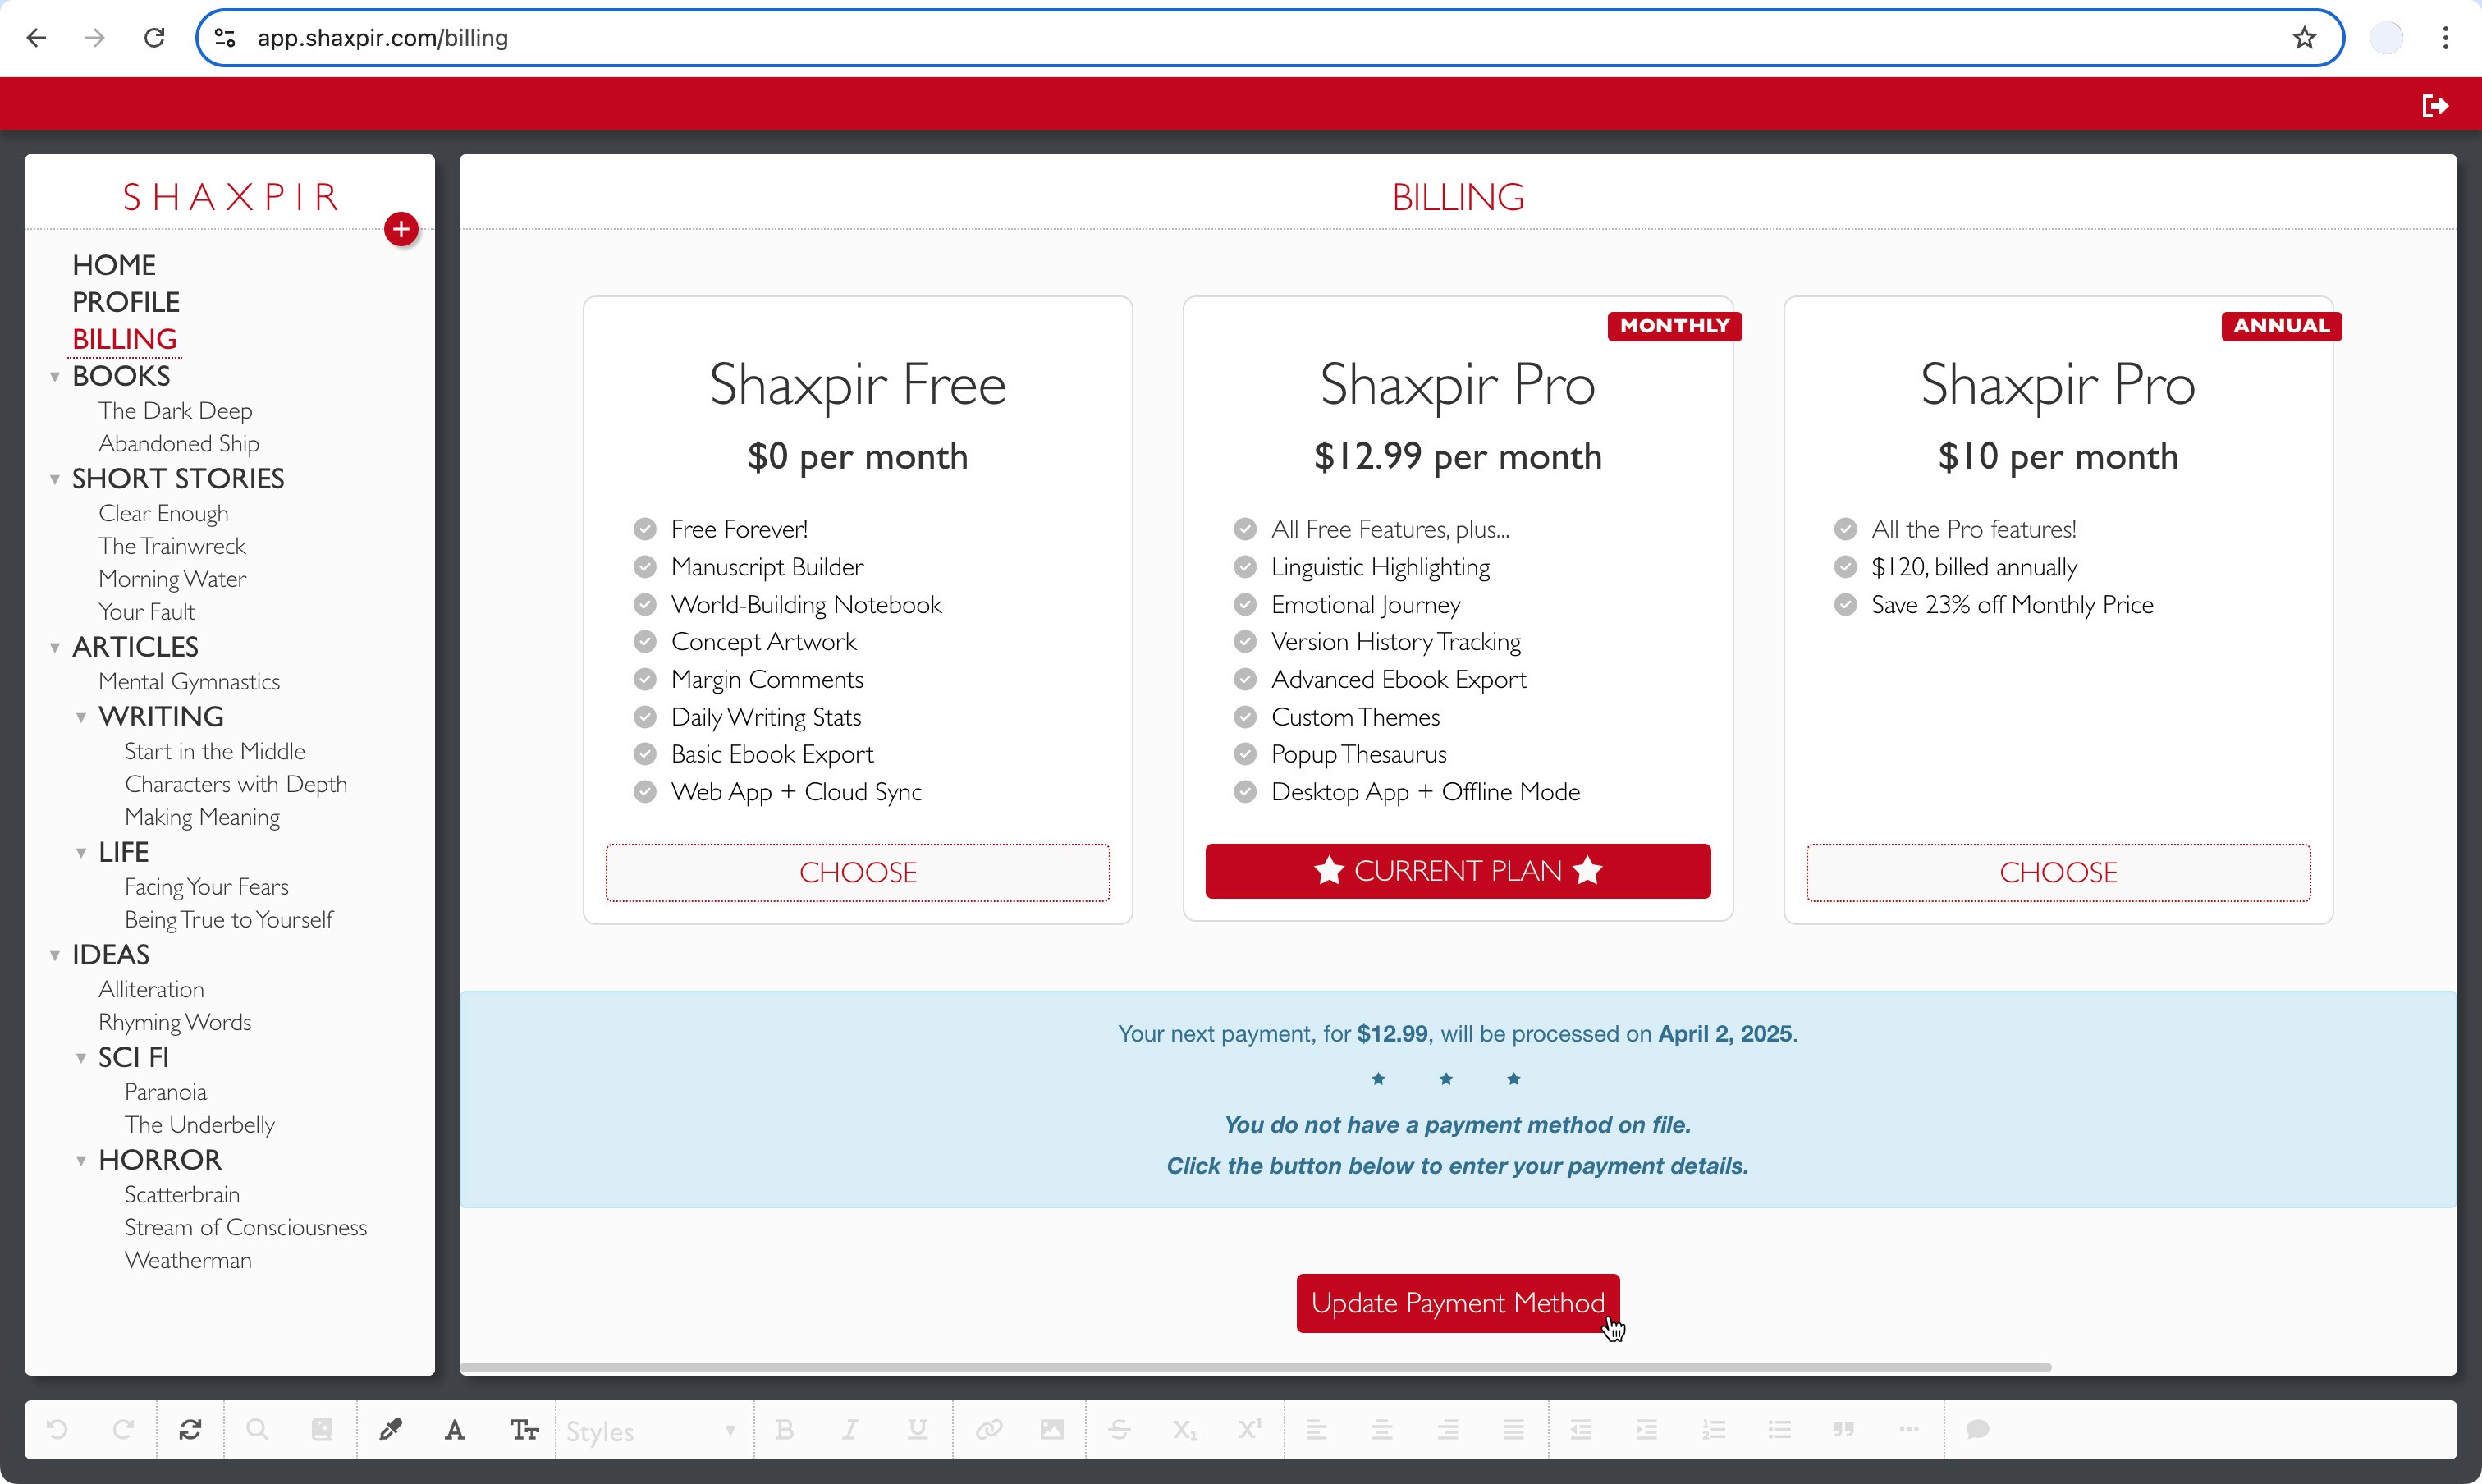
Clicking on this button will take you to our Billing Portal, which is fully managed by Stripe, the world-leading provide of secure online payment services.
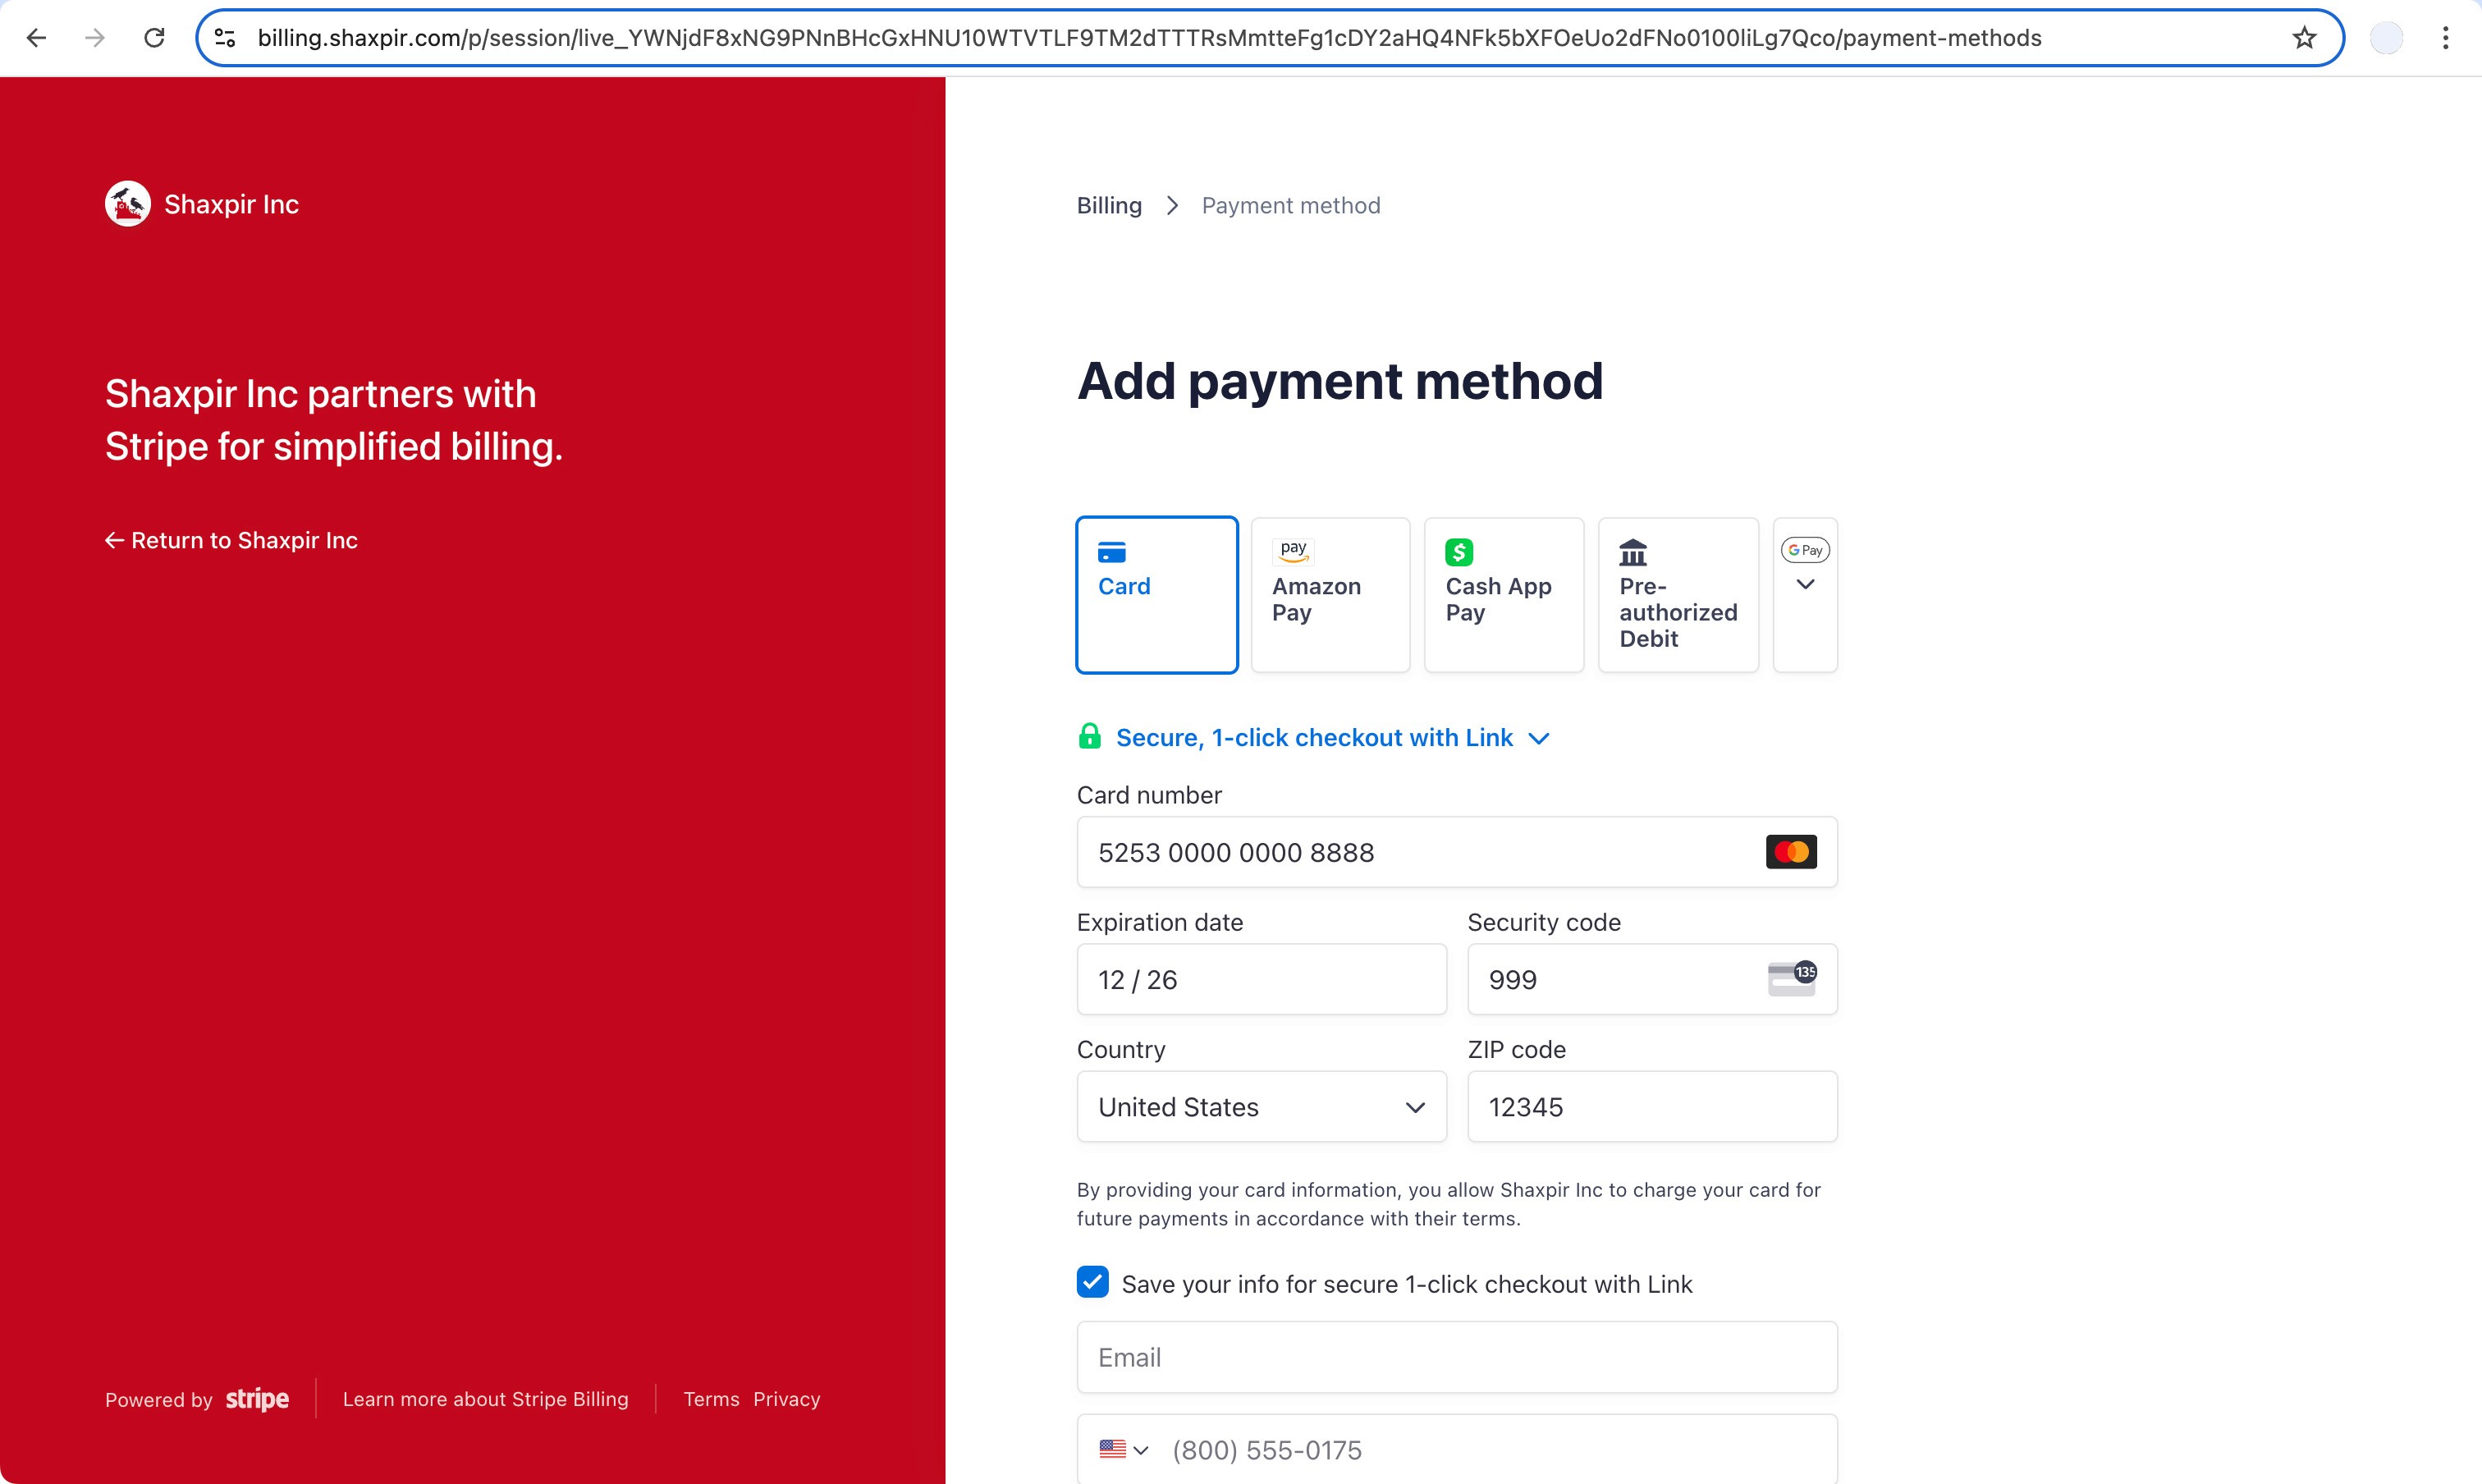
Our Billing Portal screen looks like this:
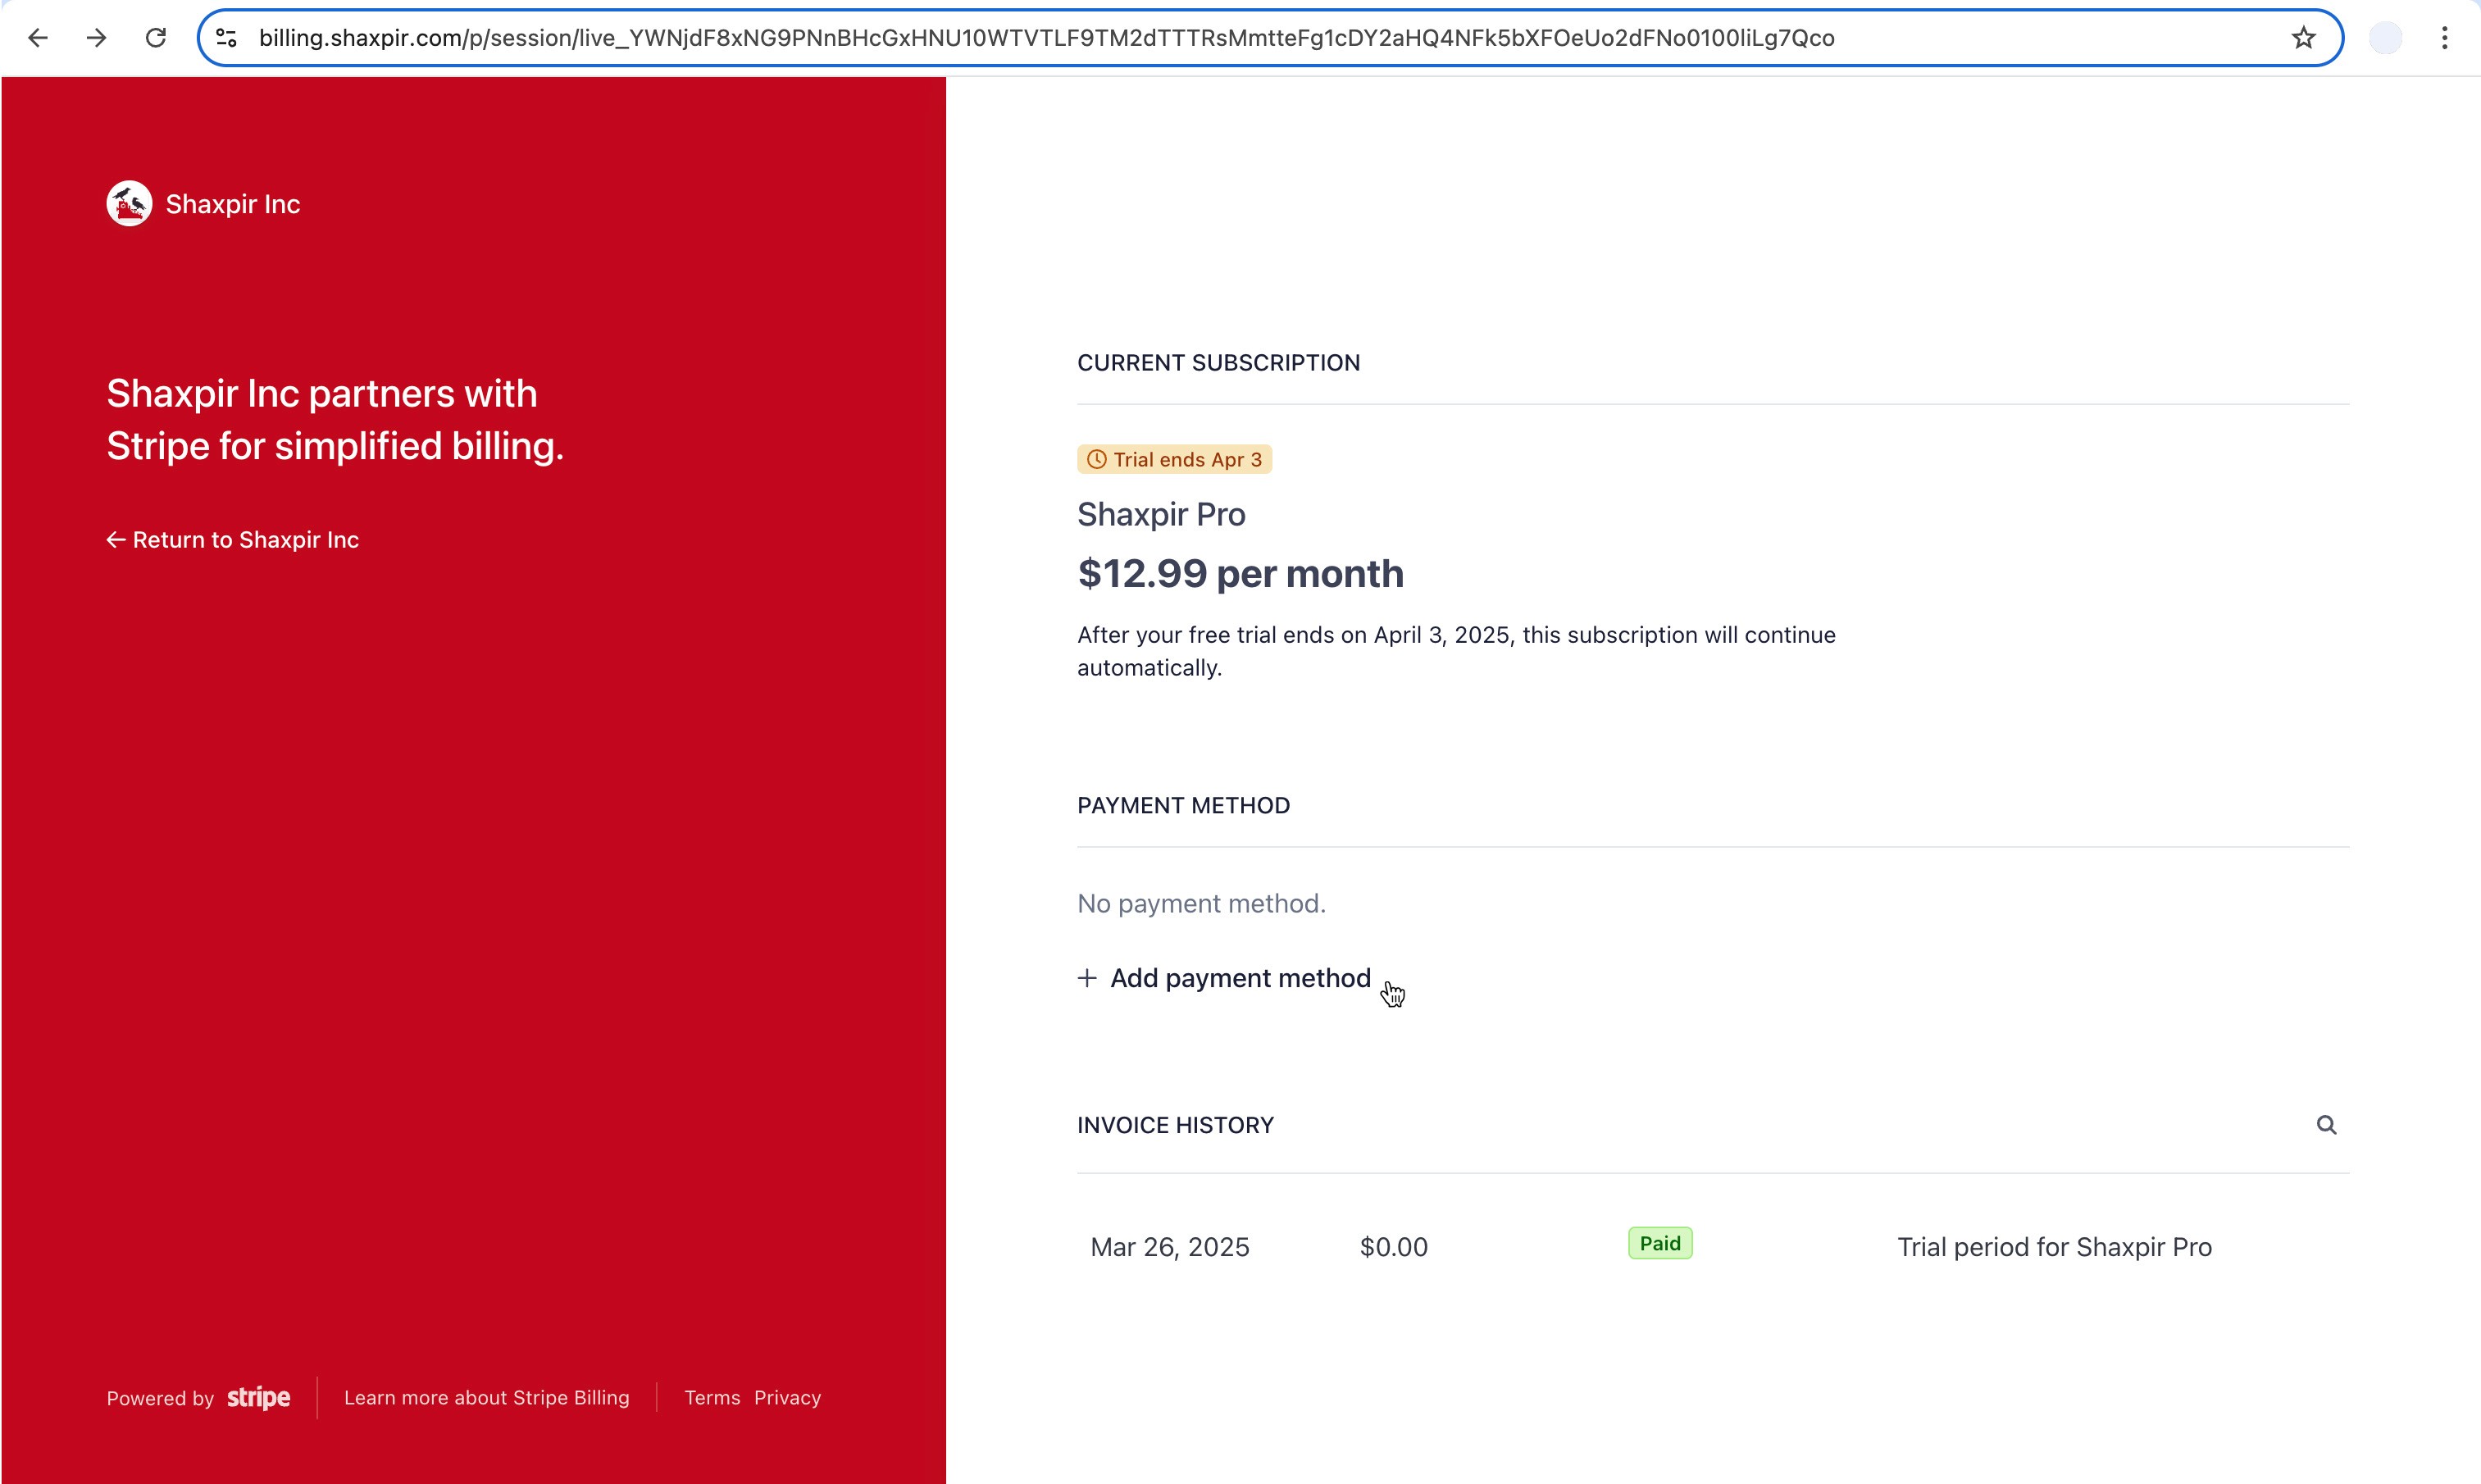
Click the link in the center of the screen that says “Add payment method”
The screen will present a set of payment options (Credit Card, Pre-Authorized Debit, Amazon Pay, Cash App Pay, etc). Choose one of these options, and enter your payment details:
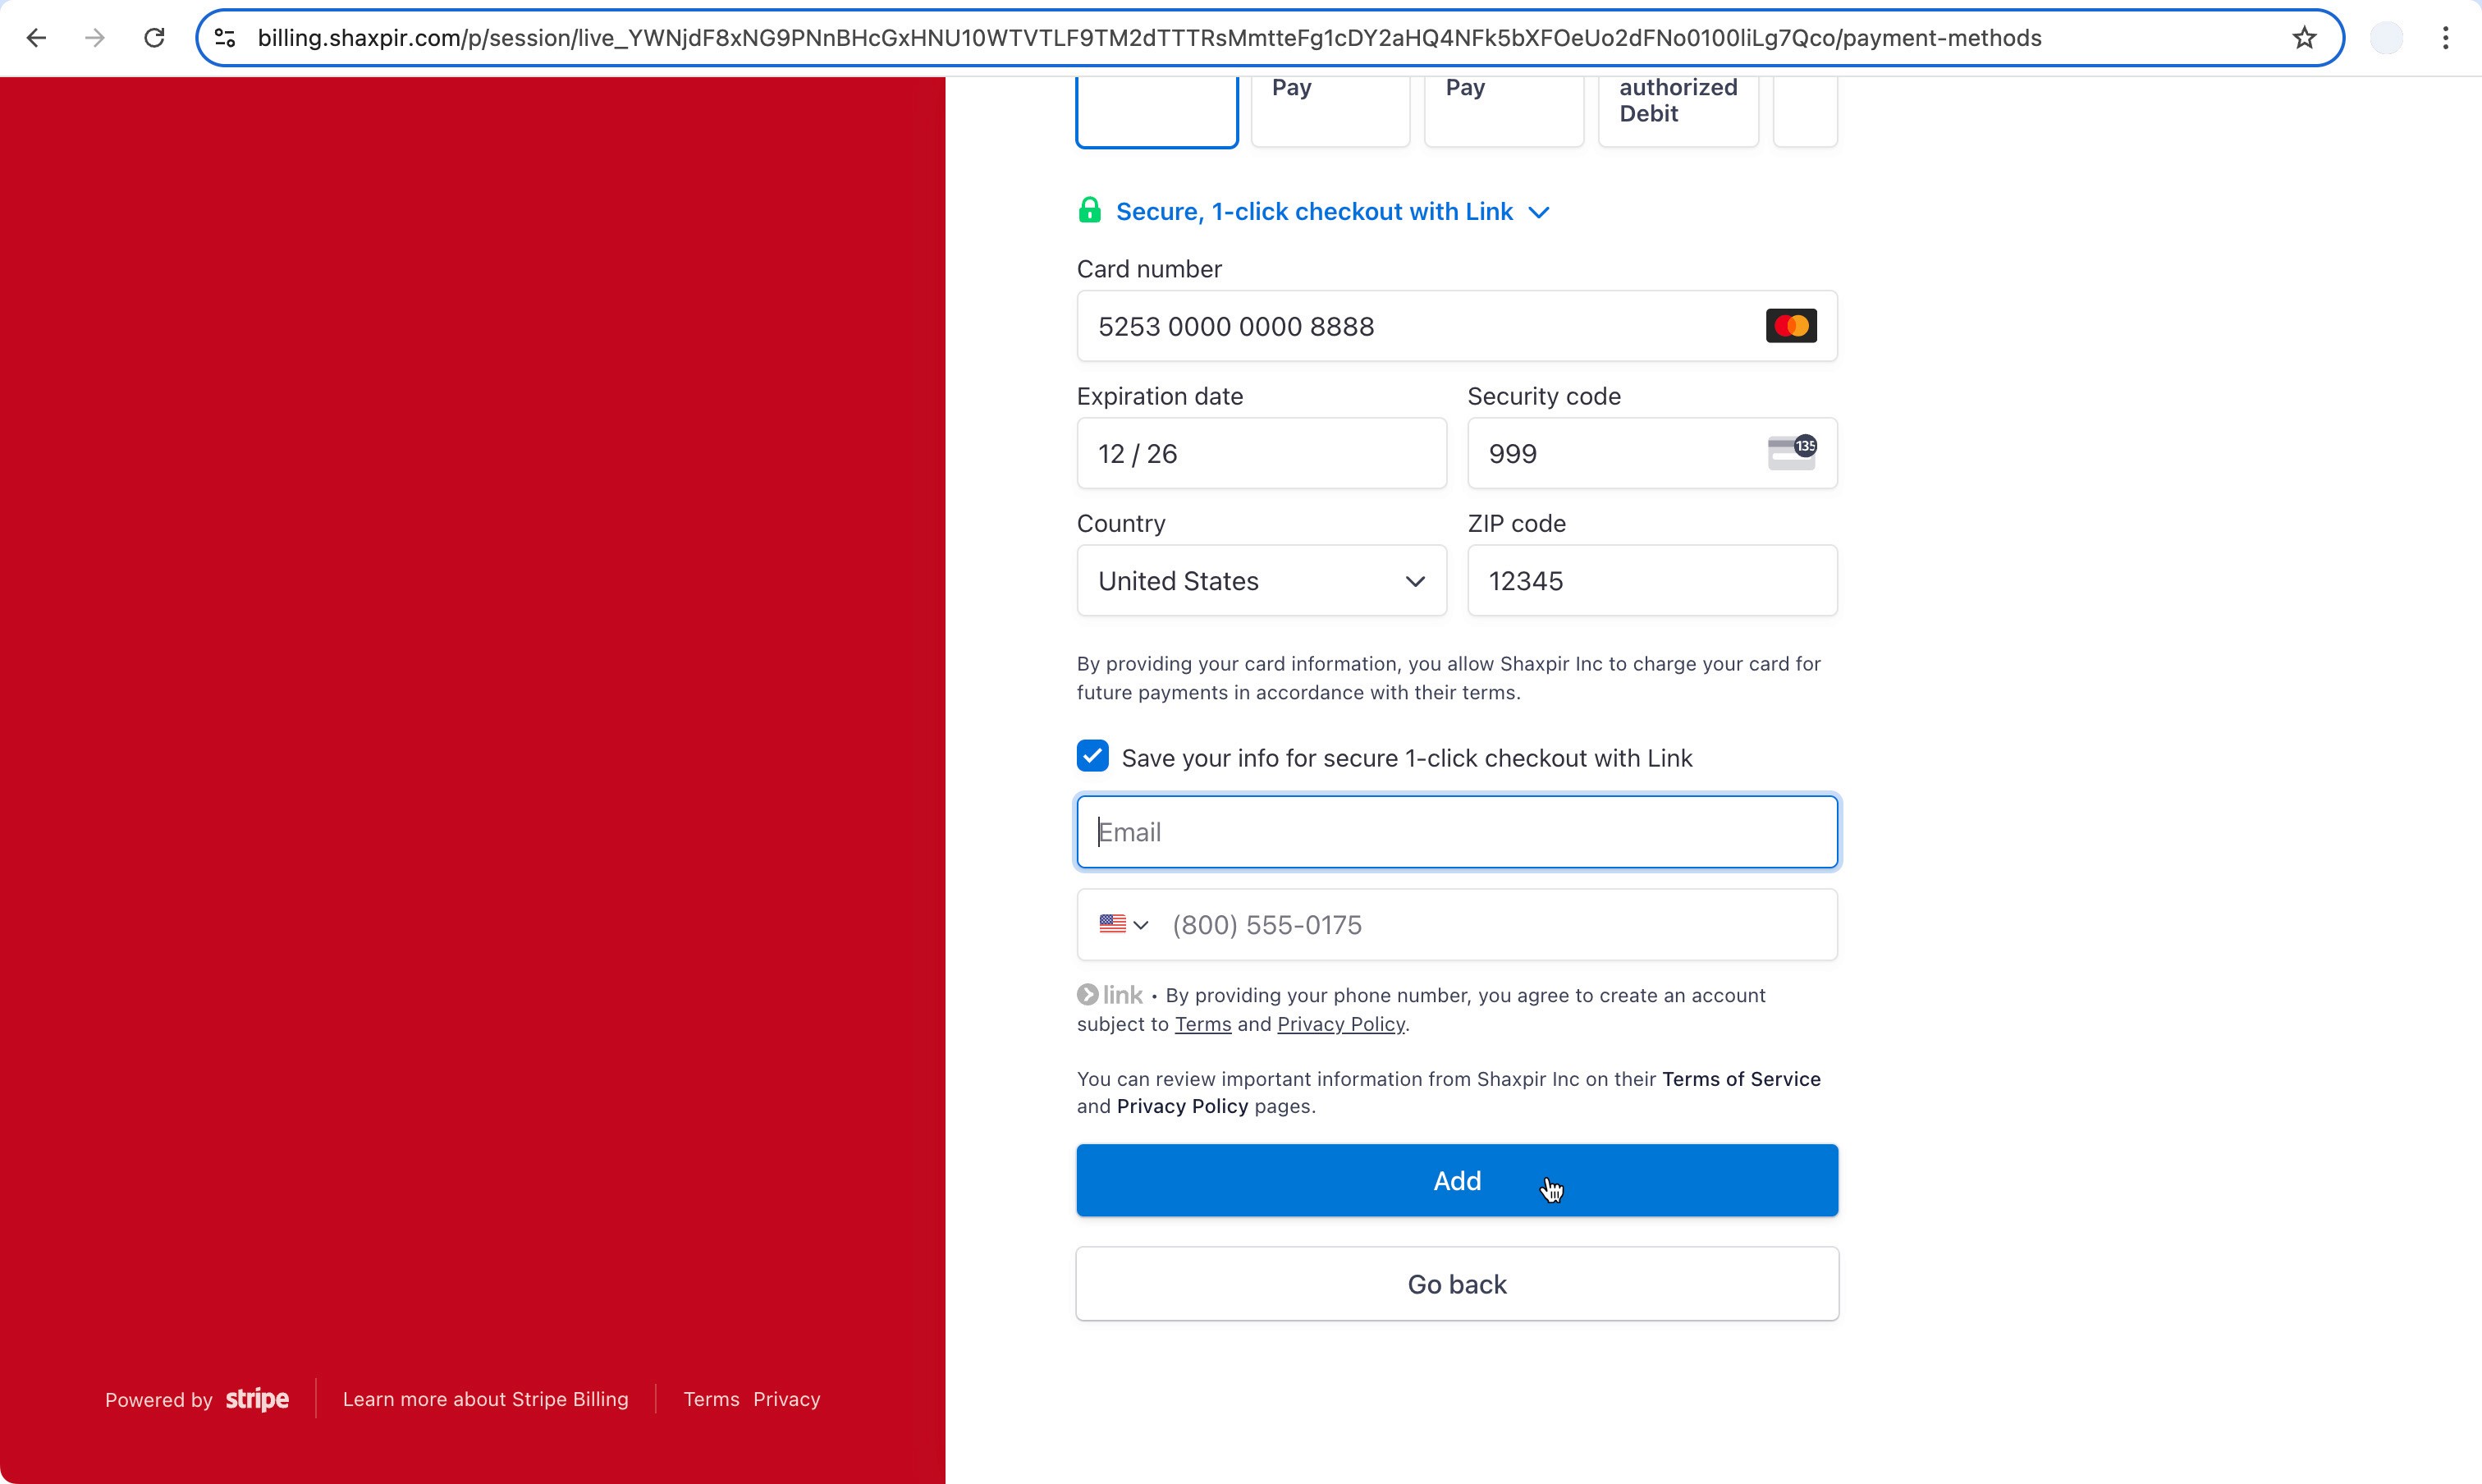
Then, scroll to the bottom of this page and click the Add button.
This will bring you back to the main Billing Portal page, where you'll now see your payment method displayed in the center of the page. To return to the Shaxpir app, click on the Return to Shaxpir Inc link, on the left-hand side of the page:
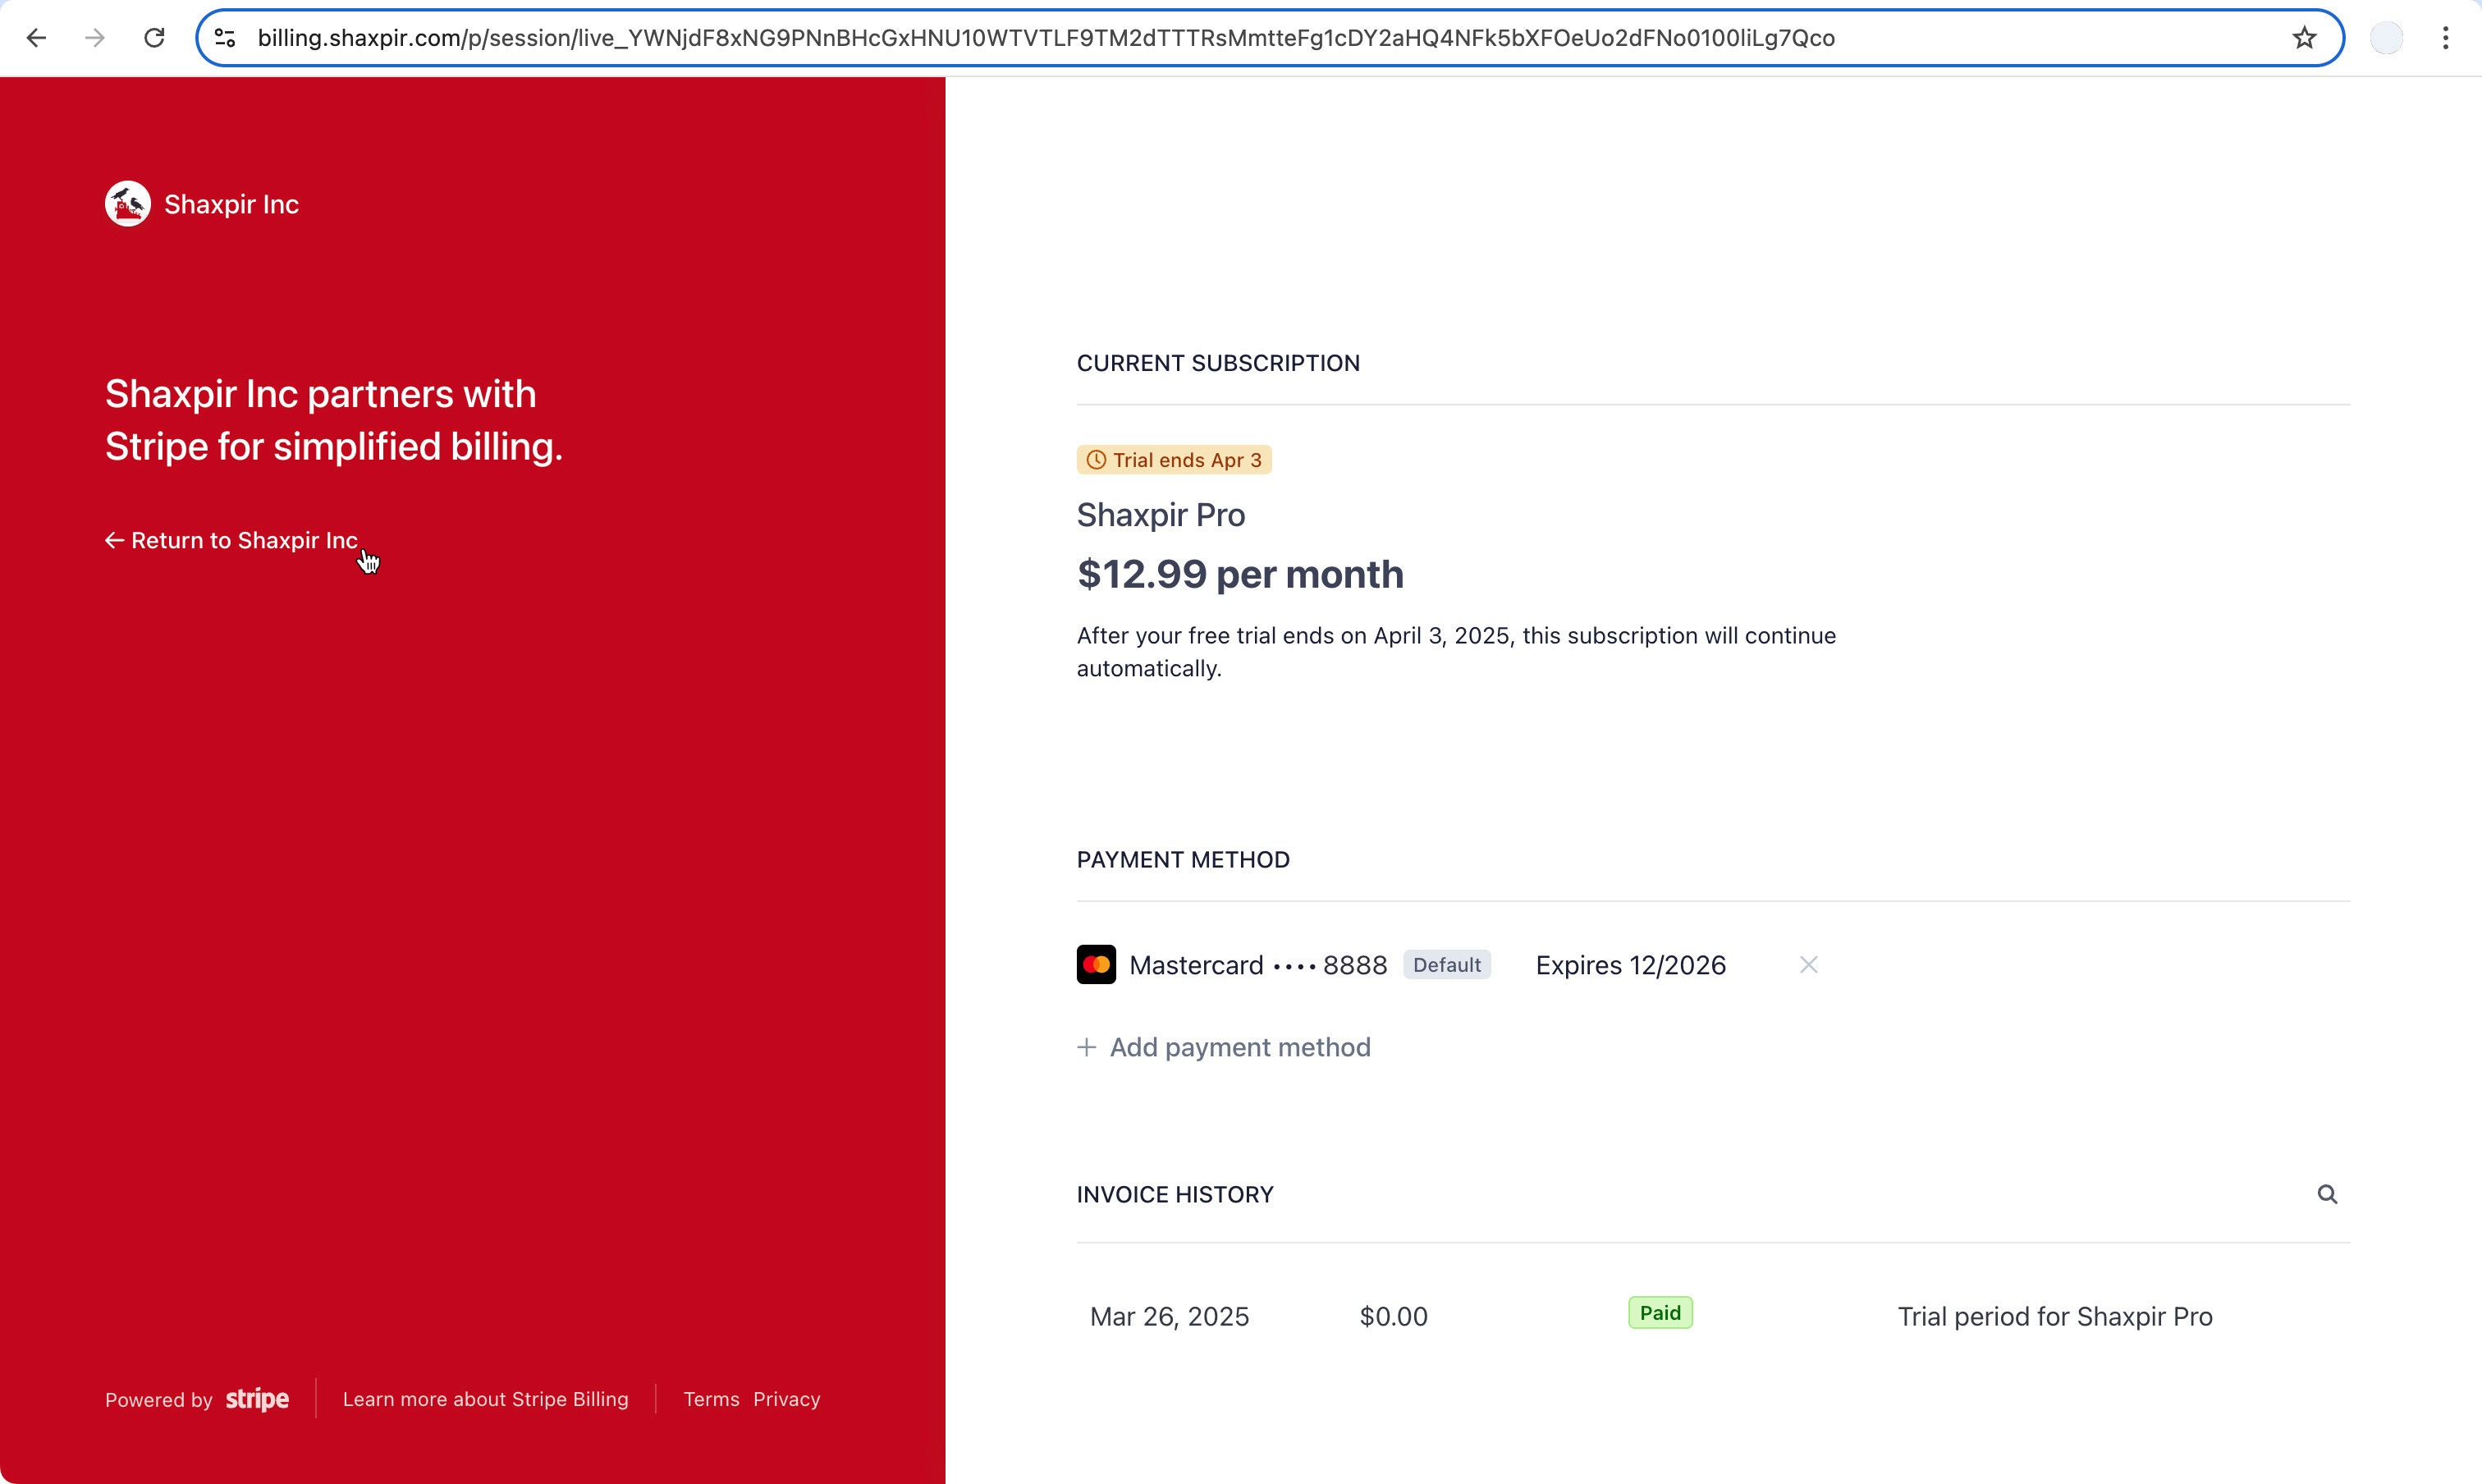
You should be taken back to the Shaxpir Billing Panel, which will now include a description of your payment method, in the blue banner below the pricing table: